 Bring it down!
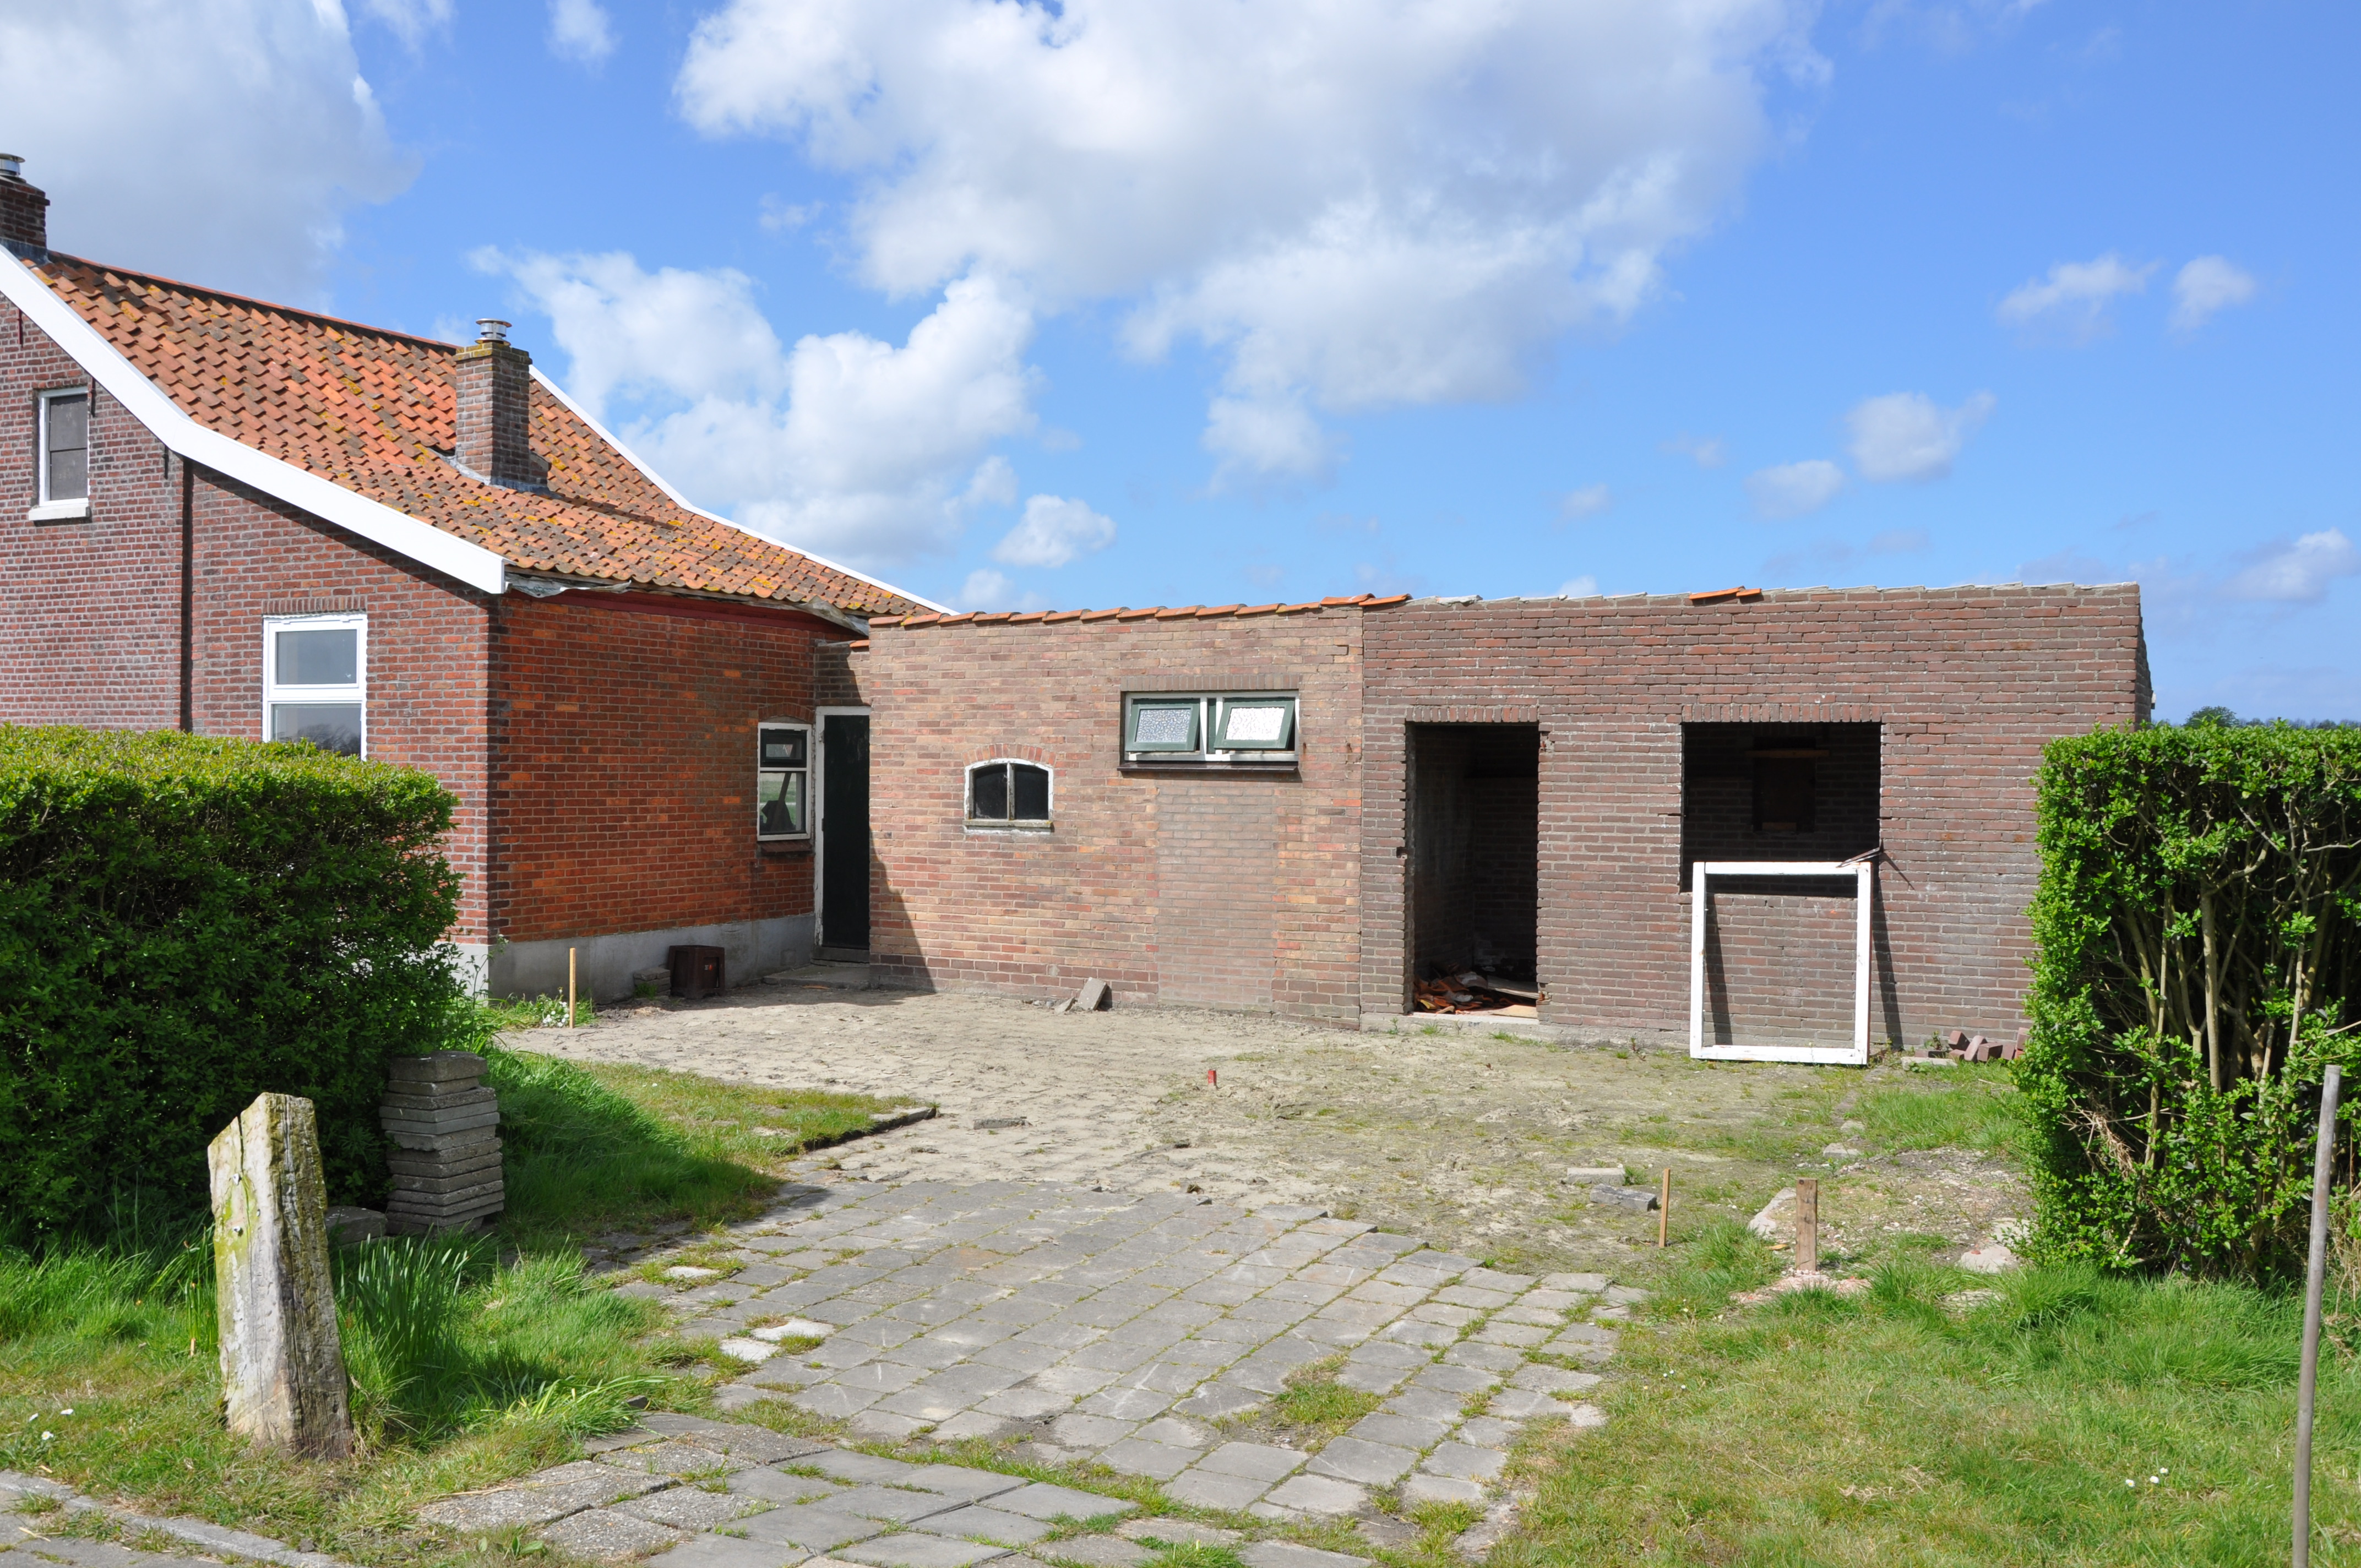
In order to start with the foundation, first we had to make room for it! Indeed, the original house had two small attachments on the rear which were not part of the extension plan so we needed to get rid of them before we could begin with the foundation work.
Due to the big amount of work and the number of people required for it, we planned the demolition of the house in April 2014, during the visit of my parents to The Netherlands. We also asked for help to my brother in law, Chris, who had vast experience driving excavators. Fortunately, the weekend in which we carried out the demolition and excavation work was sunny and dry, not so common in this country.
 Before starting with the demolition we removed all materials that could be reused or upcycled: we brought down the tiles of the roof; we cleared the paving stones of the floor and we removed the windows. Some of these tiles, stones and windows we threw them away because they were broken or rotten. The rest we piled them neatly and moved them to a storage place.
For the occasion, we rented an excavator/crane of a capacity of 3600kg [4 tons] including a jack hammer attachment, a tracked dumper of 2 m3 [3.9 cubic yards] and two containers of 10 m3 [13.1 cubic yards] to remove the wreck. These would be our toys for the weekend and the whole family made use of them!
The demolition itself was very fast: it took us a morning to demolish the two rear attachments. I made the first bite of the roof and then Chris finished demolishing the remaining of the buildings. By lunch time the two attachments were gone. What took longer was to clean up the mess we had made. After lunch, we placed all the wreck on the container and call the company in charge to switch the container for an empty one because all wreck did not fit on one. When the place was clear enough, we decided go home and rest because the next day we would be digging the ground.
Note: click here to see the album with more pictures and a video of the demolition.
————————————————————————————————
 ¡Abajo va!

Para poder comenzar con los cimientos de la casa, primero tuvimos que hacer sitio. La casa original tenía dos anexos en la parte trasera que no formaban parte de la ampliación de la casa, por lo que antes de empezar con la cimentación tuvimos que deshacernos de ellos.
Debido al enorme trabajo que la demolición de la casa requería y a la cantidad de manos que necesitábamos para ello, lo planeamos para Abril de 2014, durante la visita de mis padres a Holanda. También le pedimos ayuda a mi cuñado, Chris, ya que tiene mucha experiencia manejando excavadoras. Por suerte, ese fin de semana salió soleado y seco, algo no muy común en este país.
 Antes de comenzar con la demolición, retiramos los materiales que se podían reutilizar o reciclar: bajamos las tejas del tejado; despejamos las baldosas de piedra del suelo y sacamos las ventanas. Las tejas, piedras y ventanas que se encontraban rotas o podridas las tiramos. El resto lo apilamos cuidadosamente y lo llevamos al lugar de almacenamiento.
Para realizar el trabajo alquilamos una grúa excavadora de 3600kg incluyendo un martillo neumático, una carretilla de volteo (dumper) de 2 m3 y dos contenedores de 10 m3 para deshacernos de los escombros. Estos fueron nuestros juguetes durante ese fin de semana y he de decir que toda la familia hizo uso de ellos.
La demolición en sí misma transcurrió rápidamente: nos llevó una mañana demoler los dos anexos de la casa. Yo le di le primer bocado al techo y Chris derrumbó lo que quedada. Para la hora de comer, los dos anexos ya eran historia. Lo que nos llevó más tiempo fue despejar el desbarajuste que habíamos organizado. Después de comer, colocamos los escombros en el contenedor y llamamos a la empresa encargada para que nos trajera otro vacío, ya que todo no cabía en uno. Cuando el terreno estuvo despejado, decidimos volver a casa a descansar ya que al día siguiente nos tocaba excavar los cimientos.
Nota: aquí encontraréis el álbum con más fotos y un vídeo del proceso.

Pingback: Excavation | The Shed